Control your PC with Home Assistant
Table of contents
The main element of the manual is an example of hibernation setting with HASS WS, I will also show you how to set the computer to turn on using Wake on LAN (WOL). It is an application that allows you to manage your COMPUTER using home assistant, such as locking your PC, restarting, hibernating your COMPUTER, remotely monitoring gpu load.
It also provides useful sensors in the Home Assistant, such as:
- CPU Load – CPULoad,
- Processor Clock – CurrentClockSpeed,
- Start-up time – LastBootTime,
- Microphone display – MicrophoneActive,
- The current sound intensity from the system,
- GPU load,
- The amount of RAM consumed.
Setting this up allows you to create amazing automations to manage your laptop, computer or workstation.
Examples
- Hibernate, turn off your computer remotely, or turn on your TV or console,
- Press your computer when you turn on your TV, console, or connect to your phone.
- Turn on the light for a video call (when the camera is active),
- Send notifications to the Home Assistant mobile app under heavy CPU, GPU or Ram load,
- Sound control.
Requirements
- Home Assistant Server
- Windows 10 on the PC we want to control
- MQTT broker installed, configured in Home Assistant (you need to know the password for it).
It works by installing a service in Windows (which runs in the background) and communicates with the MQTT broker you have configured in your Home Assistant.
Installation and manual to control your PC
You can download the program from here: https://hassworkstationstorage.z6.web.core.windows.net/publish/setup.exe
You’ll see a blue “Windows Protected your PC” screen. This is because the user .exe a certificate without a digital signature from a known certification center (i.e. its own).
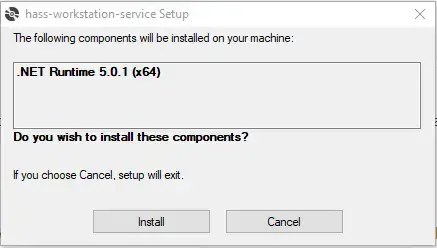
Click More Information > Still Run. If you don’t have .NET 5.0.1 installed, you’ll be prompted to install it. You will then receive a “Publisher cannot be verified” warning.


When finished, the application will start automatically. Now it’s time to set up the program.
Initial configuration settings
Before you configure the settings, make sure that the hass-workstation-service.exe is running.You can check this in Task Manager > details.


Configure settings with Home Assistant
Add a Home Assistant IP address (mine is http://192.168.68.124:8123/) The broker’s default port is 1883.
Type the user name and password into the MQTT of a broker, disable the “Use TLS” option, turn on Startup to start the service with the old computer. Finally, save your settings with the Save button.


After you change the state from NormalDisconnection to connected, you can start adding sensors. This part is obvious, just click add and select a sensor or command from the drop-down list. Then they will be available in the Home Assistant as entities.
Set remote hibernation in Windows
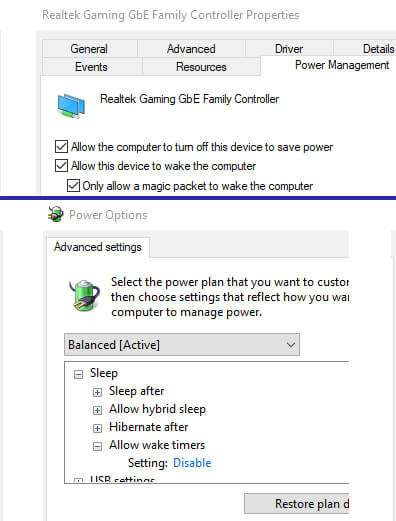
Select CustomCommand by typing in the Command field “shutdown / h“, the name field is the name that will be available as an entity e.g. in the Lovelace interface. To prevent your computer from waking up for no reason, set“Only allow a magic packet to wake the computer”. The device manager disables mouse and keyboard wake-up (HIF devices).


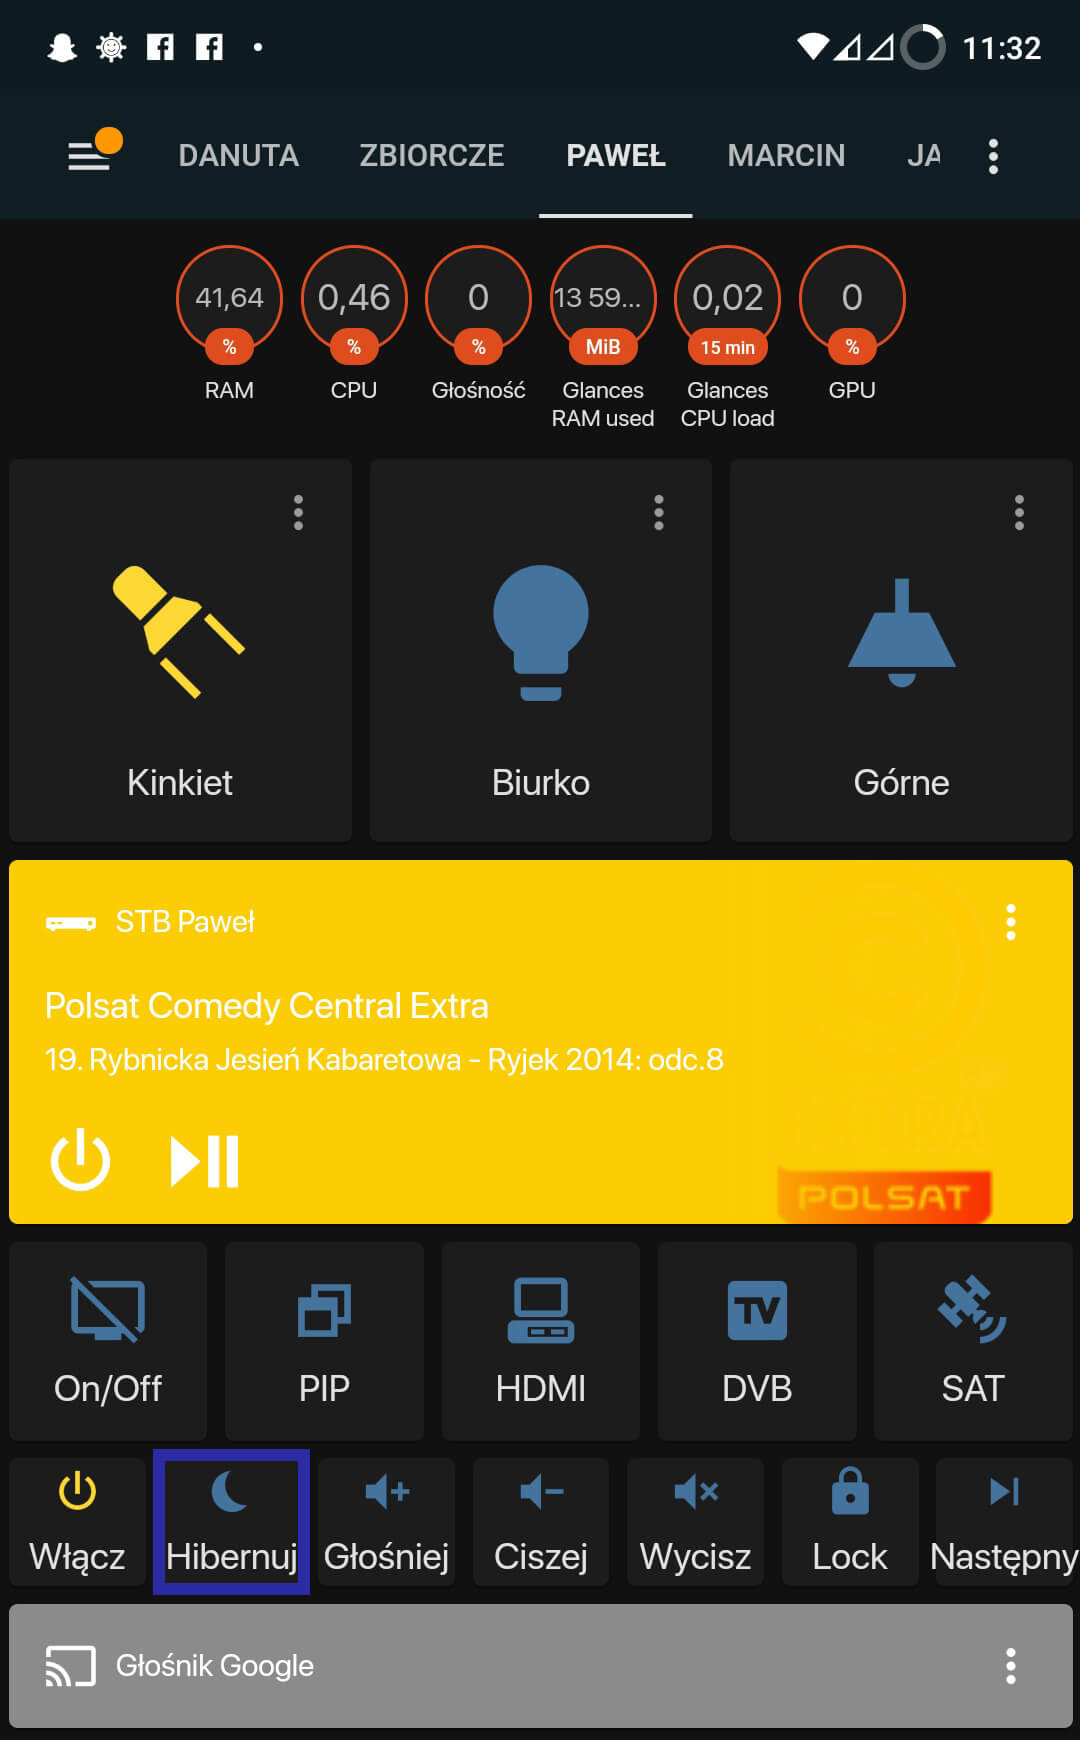
When you press the the added button, your computer will be put to sleep.
Wake on LAN in Home Assistant
The “Enable” button is shown in the hibernation preview screenshot, this is an option to turn on the computer from the Home Assistant, it is useful for remote startup of the computer and e.g. a connection to the remote RDP desktop or chrome remote desktop.

In the configuration.yaml file,add a switch with the mac address of the network adapter, enable the option in the network adapter settings nt. WOL (Magic Packet), sometimes there is an option to resume the computer from sleep modes.
Zmień język – Change language
Blog categories
- Automatization (2)
- Computer (9)
- Curiosities (5)
- Graphics (2)
- Software (8)


